Showing posts with label bibliobags. Show all posts

May 14, 2012

BiblioBags Custom Book Purse Giveaway!


This month marks the second anniversary of my Etsy shop, BiblioBags.  To celebrate, I'm giving away a free custom book purse!  


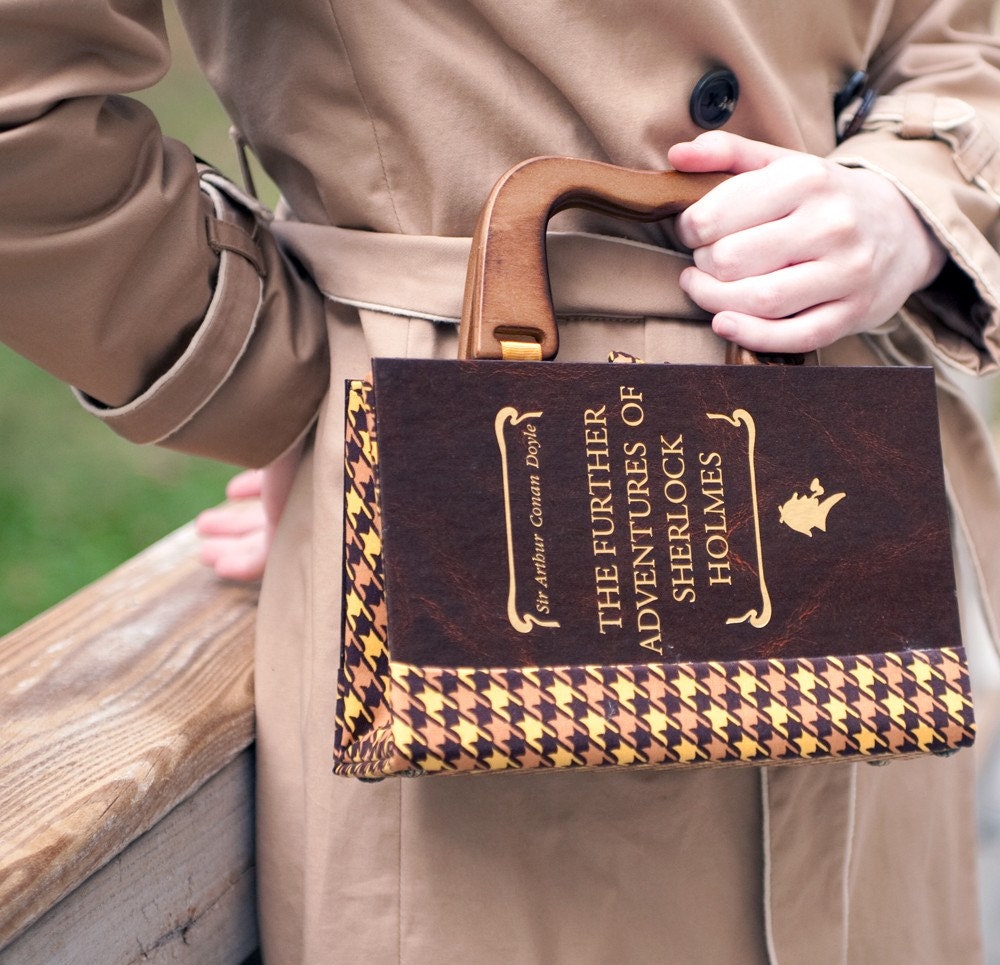
FREE CUSTOM PURSE FROM BIBLIOBAGS GIVEAWAY
 

An up to $85 value!
                                                                                          
How to enter:

1. Post what book you would want made into a custom book purse on BiblioBags’ Facebook Wall as many times as you like.

2. Post one comment on this blog.

I will choose a winner at random next Monday, May 21st and announce it on my Facebook wall and on my blog.


Rules:

1. All entrants must be 12 years or older.  However, I will make whatever book purse (within reason and the following rules) you like for whomever you like!  Say your 9 year old niece really wants one . . . you can enter the contest and I can make a book purse for her.  Make sense?

2. All materials including the book, fabric and handles must be within my set budget.  No $400 first edition books or diamond encrusted handles, okay?  I’ll let you know what is reasonable and what is not.

3. Please no books that include or promote pornography, hateful speech, symbols, etc.  Let’s keep it nice and clean, folks . . . especially on the cover!  Example: Your favorite book may be a historical text on WWII but if it has a swastika on the cover, I’m not comfortable making a purse out of it.  While we’re at it, no religious texts allowed either.  I don’t want to anger any dieties . . . my life is complicated enough.  I reserve the right to turn down a book if I find it offensive or inappropriate.  But relax.  I may be Mormon but I’m pretty laid back.  I just don’t want to put my name on something that is offensive or in excessively bad taste.  A little bad taste I’m okay with.  Wink, wink.

4. Your choice of book is subject to my review, meaning, if it’s too shabby to make into a purse, you’ll have to find another one.  I prefer hardcover/hardback books in good condition.  I will try to make your wildest book purse dreams come true but if it’s not possible, we’ll have to try something different.  So be patient with me!  (Because the best way to make someone patient is to throw an exclamation point at them . . . )

5. Please allow at least 5 weeks for me to complete your custom purse.  Sometimes I am backed up with several orders at a time, sometimes I have none at all.  It just depends on my work load at the moment.


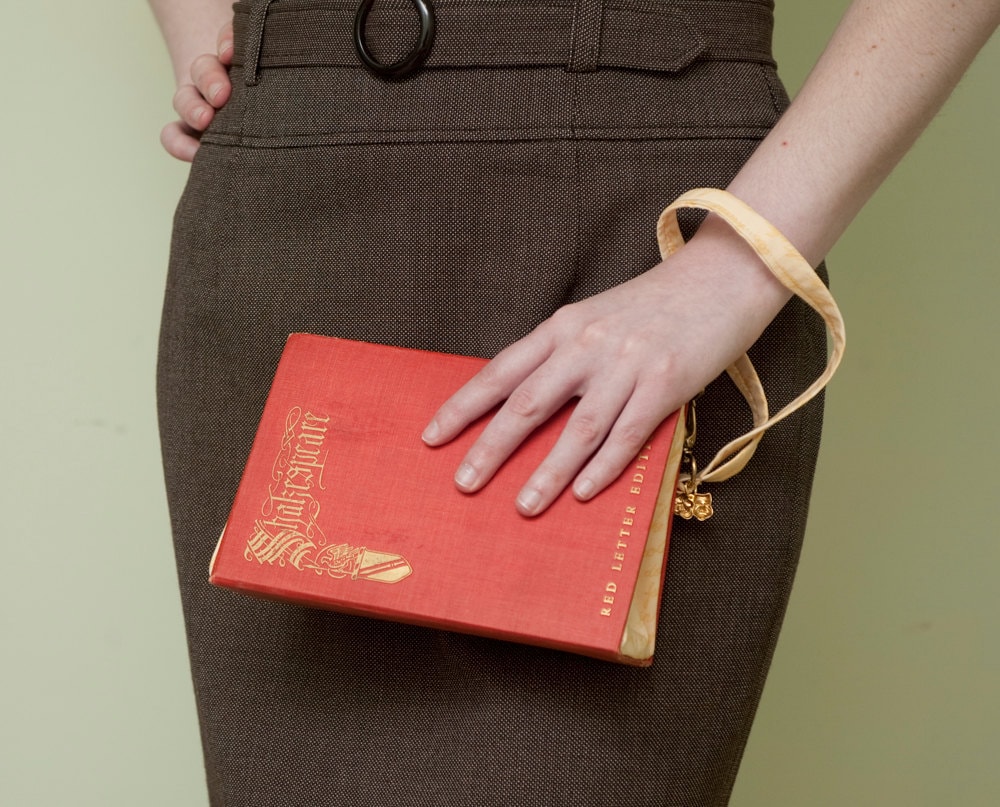
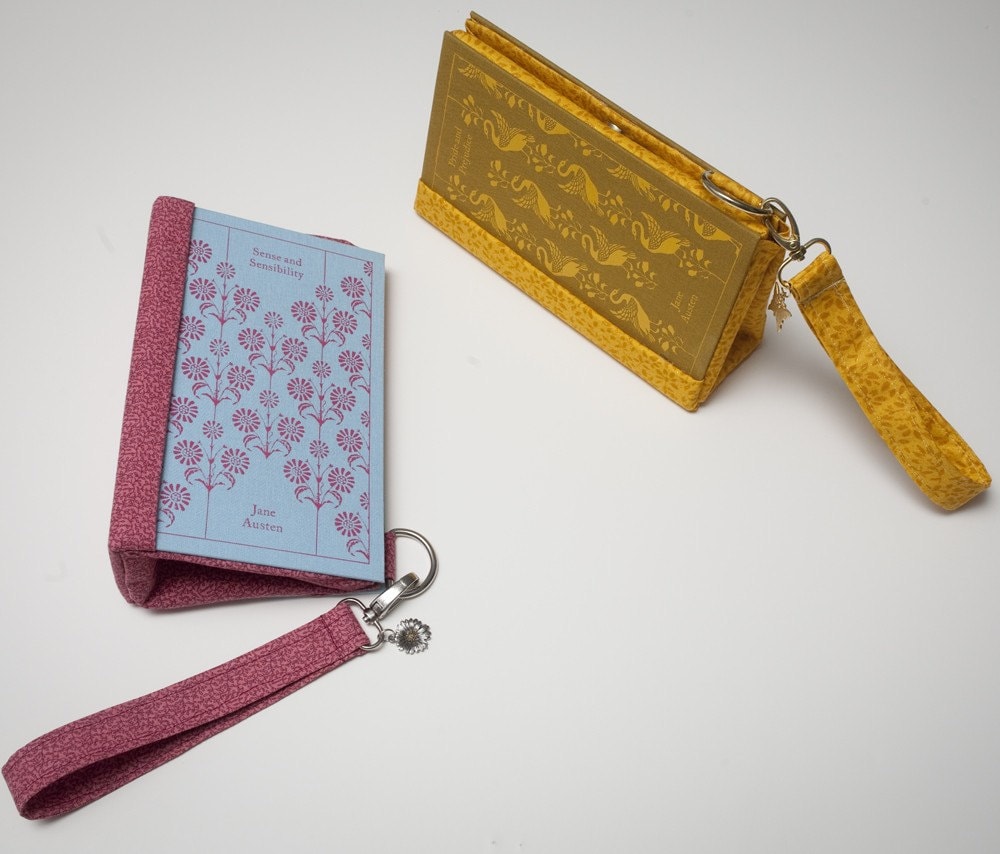
Need ideas?  Go to my shop page and peruse my “sold” listings.  There’s a huge range of what can do and what I have done in the past. 


GOOD LUCK!

September 5, 2011

HodgePodge Sneak Peek!

Well, it's that time of year again . . . craft fair time!  

This year will be my second year with a booth at HodgePodge, my hometown's craft fair.  Last year was my first time and I learned a lot.  I did reasonably well and made a pretty good profit.  I'm super excited for this year since I have a lot of new items I didn't have last time.  I'll actually have lots of jewelry this year: book spine bracelets (which I came up with AFTER HodgePodge last year), book themed pendants and charm bracelets made from book pages.  For this post, I think I'll just show off purses.  I'll post pics of my jewelry soon!

Last week I purchased a special purse hanger on eBay (for $35!).  Check out how cute (and please try to ignore my mess on the table)!


It only holds 10 purses, so I'll have to find other ways to display them.  Speaking of purses, I already have two made especially for the fair.  I wanted to have a better selection of classics this year, so I'm not posting these on Etsy.  Here is an exclusive sneak peek!


I made this brooch inspired button for the purse closure.  The image was cut from the book and I coated it in some sealer.

Yes, that is Alice in Wonderland fabric!  It's covered in the original John Tenniel illustrations--love it!


Here is a shabby chic "Pride and Prejudice."  The book cover was faded and had spots but I think that only adds to the charm.


A similar brooch-like button for this purse, again made from a book illustration.  It's purty.  ; )  Right now I'm working on a "Wizard of Oz" book clutch that is very different from the classic style of these two.  Imagine if Tim Burton had directed the adaptation and you'll have an idea of the style.  I'm very excited to show it off . . . which I will in a couple of days when it's done!

August 26, 2011

T-Skirt Tutorial: Turn a Men's T-Shirt into a Skirt!


I love t-shirts.  In fact, I'm a little obsessed with them.  At one point, I owned 60+ t-shirts.  When I first saw the idea for a t-shirt skirt, I was excited to say the least.  Besides being cute, they are extremely comfortable!  I wore mine with flip flops in the summer heat and it was so nice.  I think I'll wear it through fall by layering it with leggings.

I researched and read several different methods for making a skirt from a t-shirt and found they were more complicated than they had to be.  By accident, I recently discovered foldover elastic.  This stuff is genius . . . why didn't anyone tell me about it earlier?!  Anyway, I decided to try using it as the waistband for this skirt and it was crazy easy and fast.  Here's what you'll need to make your own:

A t-shirt (preferably a men's size . . . I'm a size 6 and used a size "L" shirt)
1 yard foldover elastic (available through this amazing Etsy shop)
Thread

1. Turn the t-shirt inside out.  Now, if you have a skirt that fits well, get it out now.  I used an old a-line skirt as a template.  I laid it on top of the shirt and drew the shape onto the t-shirt with chalk.

2. Using the chalk outline as a guide, cut the t-shirt.  Be sure to leave about an inch outside the chalk for seam allowance.  Pin the sides of the skirt at the chalk line.

3. Sew the sides of the skirt.  Be sure to try it on to see if it fits well.

4.  Following the line down the middle, fold the elastic over the waist and pin.  When you get to the end, fold the elastic over once and then fold that portion over the starting point.  Pin down, then sew.

Tah-dah!  You're done!  Super easy, fast and cute.  I can't wait to make more!  If you make your own, please post your results!

I'm currently having a giveaway on my Facebook page right now.  Post the word "Alice" to my wall (as many times as you'd like) for a chance to win this "Drink Me" necklace I made:


You have through Monday, August 29th to enter.  The winner will be announced Tuesday, August 30th.  Good luck!